

Like physical clutter, it creeps up on you, and then suddenly you can’t use your phone because you have no more storage.
Or until you’re trying to find an important email buried in thousands of other emails – mostly junk.
Or until you get a receipt for an app you don’t recall paying for in the first place, but you did because you have too many apps to keep track of.
You get the hint.
It’s just as much a problem as physical clutter and it’s important to be proactive about it so it doesn’t add more stress to an already stressful life as a mom.
This is the time of year that I clean up my email, computer files, and phone storage. I could be doing so many other things, but from experience, not getting my digital stuff in order is asking for trouble.
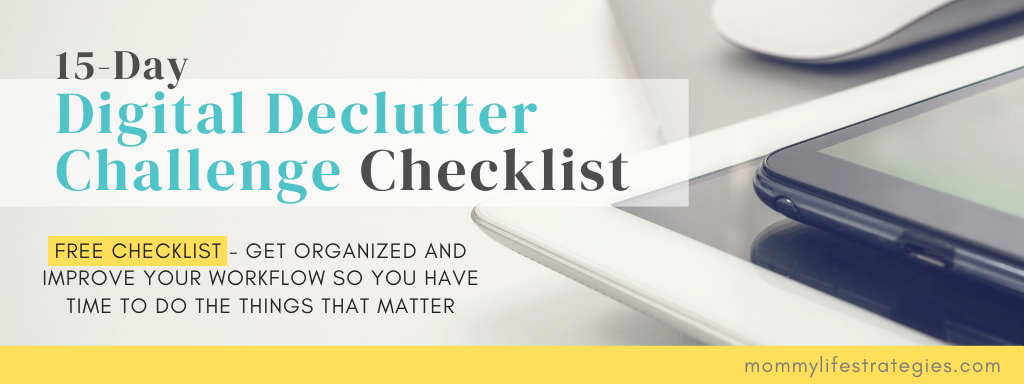
So, if you’re struggling with an overflow of images, videos, emails, or other digital clutter, I’ll guide you through the process of clearing the clutter in the next 15 days.
By the end of the challenge, you will be noticeably more digitally organized than before.
Why 15 days?
Unless you are already very organized and proactive about clutter, decluttering takes time and energy.
Spreading it out over 15 days is a sensible plan for this kind of activity.
You are welcome to do it in less time, but you know that as a busy mom, cramming too much at once is not an effective approach.
No more waiting till it’s an emergency.
No more waiting till you have to troubleshoot your devices to be able to use them.
If you are overwhelmed with digital clutter, let this challenge guide you to be better organized digitally and sustain it.
Are you ready?
Disclosure: Some of the links below are affiliate links. As an Amazon Associate, I earn from qualifying purchases. That means that, at no extra cost to you, I will earn an affiliate commission. Learn more about it on my disclaimer page.
The challenges and risks of digital clutter
First, it’s important to know the challenges and the risks of digital clutter as there are a few. With life as a mom being so busy and hectic, you might forget that you have some unattended digital stuff to manage.
Here are the key challenges and risks of digital clutter.
- Time: Like physical clutter, if it accumulates and is left unattended, it will take a significant amount of time to fix. Regular upkeep is the best way to manage digital clutter.
- Stress: When your devices are sending you alerts or are crashing, rebooting, or just shutting down, that can add some extra stress you don’t need.
- Security: Without regular maintenance, security scans, etc., you are at risk of security breaches. You are at higher risk of identity theft and malware.
The benefits of decluttering your digital spaces
You know how good it feels to have a decluttered physical space, the same will apply to your digital space too. Here are the benefits of decluttering your digital world.
- Time: Just like how it can steal your time you can gain it back if you regularly declutter.
- Storage: Any digital device needs storage. With regular decluttering, you will always have ample storage for when you really need it.
- Efficiency: Your devices will run better and that means you will run better too. A device that runs efficiently will help you work efficiently. That’s its purpose.
Digital maintenance worth your time and investment
There are some tools you can use in addition to your regular digital maintenance routine that can make digital clutter management easier.
Here are some suggestions of tools you can use for file storage, customization, app control, safety, personal task management, and productivity.
- External hard drive -Extra storage needs for large files like image files
- Microsoft 365 Family
-Cloud storage, and programs to manage your everyday
- Folder Colorizer like Folder Marker
- 1Password -Password manager
- RescueTime –Time tacking & Focus app
- Freedom – App management for full focus
- Todoist – simple task management
- Unroll.me – a tool that helps you easily unsubscribe from unwanted emails and newsletters.
- CCleaner – a tool that clears out temporary files, internet history, and other clutter from your computer.
- AppCleaner – a tool for MAC that helps you uninstall apps and clean up leftover files from the app on your computer.
- Disk Cleanup – a built-in tool in Windows that helps you remove unnecessary files from your computer.
- Cleaner One – All-in-one disk cleaning & optimization for MAC
Day 1 - Take Inventory
Take inventory before you can start organizing, you need to know what you’re dealing with.
Are you overflowing with files on your computer? Your Phone? Emails? Or apps?
Identify what you use regularly, what can be deleted, and what needs to be organized and updated.Download my Digital Clutter Checklist here to make it easier to take inventory.
Check your phone’s internal storage to view usage. Your phone will have a storage and/or battery setting where you can see how many GBs are used and where it’s being used.
Images, videos, audio files and some apps can take up a lot of storage space.
Next up, take a look at your computer. Is it up to date with software? How many folders and files? Are they labeled properly?
With any device, you should be able to navigate it without difficulty. If your computer has files, folders and software you’re not sure what they are or if you even use them, it’s safe to say it’s disorganized.
Now that you are on your computer, check your email. Not to check what you received but to check how many you have, how many folders (if any), which ones can be purged, and which ones can be updated.
Don’t forget other devices like tablets. Consider other sources of digital clutter like social media accounts, bookmarks, note-taking apps where you saved lots of information, password documents, and online accounts you signed up for but forgot about.
Think of any digital space you have your information on or saved files on and write it down for assessment and decluttering.
Day 1 is going to be your prep day. Plan at least 1 hour tomorrow to do Day 2 of the challenge. Don’t forget to download my free digital declutter checklist before moving on to Day 2.
Day 2 – Delete unused apps on your Phone.
Go through your apps and delete any that you no longer use or need. Just like you would never keep a physical item for “just in case”, keeping an app just in case you might use it, is not ideal. Save the storage space and keep only what you use regularly and is useful.
Find what apps you use the most space on your android phone or iphone.
Here’s how to find it.
Android phone:
- Go to your phone’s settings.
- Scroll down and select “Battery.”
- Tap on “Battery Usage” to see a list of apps that have used the most battery over the past 24 hours or seven days.
- The apps that appear at the top of the list are the ones you use the most.
You can use a third-party app like Digital Wellbeing to track your app usage and see which apps you use the most.
iPhone:
- Go to your iPhone’s settings.
- Scroll down and select “Battery.”
- Tap on “Battery Health” to see a list of apps that have used the most battery over the past 24 hours or 10 days.
The apps that appear at the top of the list are the ones you use the most.
Alternatively, you can use the “Screen Time” feature to track your app usage and see which apps you use the most. To enable this feature, go to your iPhone’s settings, select “Screen Time,” and turn on “Share Across Devices.”
Day 3 – Organize your Apps (Phone)
Organize your remaining apps into folders based on their purpose or category. For example, create folders for social media, productivity, or entertainment.
Steps to see which apps you don’t use:
If you have an Android device, go to: Battery Device Care > Battery > Background Usage Limits
In Background usage limits, you can activate ‘Put unused apps to sleep’. When you do this, you can see which apps your phone has put to Sleep or Deep sleep. Tap on either one or you get a list of apps that you haven’t used in some time to activate sleep mode.
If you have an iPhone, go to: Settings > General> iPhone Storage
You will see a list of apps on your phone in order of size. Decide on which apps you don’t use to uninstall.
Day 4 – Clear cache & clean up files (Phone)
Clearing the cache and temporary files on your phone can help it run more efficiently.
Go to Settings > Storage > Cached data and select “Clear cached data” to clear your phone’s cache.
Now it’s time to clean up your files.
Just like on your computer, it’s easy to download files to your phone.
The problem is that it takes up space and because it’s easy to download, you can accumulate many files.
These files you will have to clean up at some point, it is better to maintain them regularly to avoid this.
A good tool that I use and recommend is Files by Google.
It allows you to see how much space you are using, browse, and suggestions to delete files. Overall, it’s a good tool to find files faster making it easier to manage.
Day 5 – Delete & Archive old Text Messages (Phone)
Old text messages can take up space on your phone. Delete any old messages that you no longer need or want.
View messages by date…starting with the oldest and go from there.
If you want to keep them so you can refer to them later but not bog down your list, archive them.
For Android:
- Open the Messages app on your Android device.
- Long press on the message or conversation that you want to archive.
- Tap on the “Archive” option that appears at the top of the screen.
If you want to view your archived messages, go to the main Messages screen and swipe down from the top of the screen to open the search bar.
Type “is:archived” into the search bar and hit enter.
Your archived messages will now appear in a list that you can scroll through.
For iPhone:
- Open the Messages app on your iPhone.
- Swipe left on the conversation you want to archive.
- Tap on the “Archive” option that appears.
To view your archived messages, go to the main Messages screen.
Swipe down from the top of the screen to reveal the search bar.
Type in the name of the contact or keyword from the archived message you want to view.
The archived message will appear at the bottom of the search results.
Day 6 – Delete photos, duplicates, and videos (Phone)
Duplicate photos can take up unnecessary space on your phone. Use a duplicate photo cleaner app or go through your photos manually to delete any duplicates.
Delete any old photos that you no longer need or want. Consider transferring important photos to cloud storage or an external hard drive.
Don’t forget screenshot images.
Taking screenshots is a quick and convenient way to save information or images, but over time, these can pile up and take up space on your device. Make it easier to find screenshot images by creating a dedicated folder for them. Delete any no longer need during regular maintenance.
Important: Always make a backup of your files before deleting anything and double-check that you are deleting the correct files.
Make organizing your digital world easier, get my free checklist!
Day 7 – Notifications & Newsletters (Phone and/Computer)
Turn off notifications for apps that aren’t important or that you no longer use. This will help reduce the clutter in your notification bar.
- Organize the newsletters you want to keep.
- Create a folder specifically for newsletters in your email account.
- Set up a filter or rule to automatically send newsletters to the folder.
- Unsubscribe from newsletters that you don’t read or aren’t interested in (more on that on Day 13).
- Review the folder regularly and delete or flag newsletters accordingly.
Day 8 – Update Software
Old software that you no longer use can clutter up your computer or slow down its performance.
Check your computer and your phone for updates. Always make sure you are up to date to keep your computer optimized.
For PC: Go to Settings > Windows Update > Check for updates > Download and install.
For Android: Go to Settings > Software Update > Download and install * You should have the option to Auto Update
Updating iOS on iPhone: Go to Settings > General > Software Update > Download and Install.
Updating Apps on iPhone: Go to the App Store > Click your Profile picture on the top right > Scroll to Available Updates > Update or Update All
Day 9 – Delete Duplicate Files (Computer)
Having multiple copies of the same file can take up unnecessary space on your computer.
Important: Be careful when deleting files, especially if they are important or necessary for your device to function properly. Always make a backup of your files before deleting anything and double-check that you are deleting the correct files.
Finding duplicate files for PC:
- Open File Explorer
- Navigate to the folder or location where you want to find duplicate files.
- Click on the “View” tab at the top of the page.
- Select “Options” and then choose “Change folder and search options”.
- Click on the “View” tab in the “Folder Options” window.
- Under “Advanced settings”, select “Show hidden files, folders, and drives” and click “OK”.
- Return to the folder where you want to find duplicates and click on the search box in the top right corner.
- Type in “name:” followed by the name of the file or type of file you want to find duplicates for (e.g., “name: example.txt”).
- Press Enter to search.
Look through the search results to identify any duplicate files with the same name or similar names.
If you have many files and it is difficult to identify duplicates manually, you can use a third-party tool such as CCleaner or Duplicate Cleaner to identify and remove duplicate files on your PC.
Finding duplicate files for iOS:
- Navigate to the folder or location where you want to find duplicate files.
- Click on the search bar at the top of the page.
- Type in “name:” followed by the name of the file or type of file you want to find duplicates for (e.g., “name: example.txt”).
- Press Enter to search.
Look through the search results to identify any duplicate files with the same name or similar names.
If you have many files and it is difficult to identify duplicates manually, you can use a third-party app such as Remo Duplicate Photos Remover or Duplicate File Finder to identify and remove duplicate files on your iOS device.
Don’t forget cloud storage too. If you have storage solutions like OneDrive or Amazon Drive, you will want to organize your files there as well.
Day 10- Organize Files
Files that are scattered all over your desktop or in various folders can make it difficult to find what you need. All files like image files, PDFs, etc. need to be organized and labeled clearly so that they are easy to find.
Start with your Desktop screen, how many icons, folders, and files do you have?
Do you know where everything is? Are your files in the appropriate folders? Do you have a “junk” folder on your desktop to toss files to deal with later?
Take time today to clean up your desktop, starting with the most important files and folders.
Here are some tips for keeping your desktop organized:
Minimal icons: Your desktop should have a minimal number of icons. Too many icons can make it difficult to find what you’re looking for and clutter up your screen. Figure out which apps, tools, and folders you need quick access to regularly and keep only those.
Grouped icons: If you have multiple icons on your desktop, group them into related categories. For example, have a group for work-related files and another group for personal files.
Folders: Use folders to organize your files and icons. Create folders for different categories of files and move your icons into those folders. Make sure to give your folders clear and concise names that reflect their contents.
Use a hierarchy system to organize folders. Create a folder for primary categories, then subfolders.
Example: Primary Category – Finances. Nested down into other subfolders to Home> Business>Travel Budget>School Budget>Taxes, etc.
Use color-coding: Color-code your folders to make it easier to identify them quickly. For example, use blue for work-related folders and green for personal folders. I use Folder Marker.
A recap of the steps you will follow today to clean up your computer:
- Organize your desktop with clear folder names and minimal icons.
- Use a visually appealing, simple background image.
- Customize the taskbar with only the necessary programs.
- Delete unnecessary files and create consistent file names.
- Uninstall unnecessary programs and remove start-up programs.
- Back up files regularly and keep software up to date.
- Create shortcuts for frequently used files.
- Use a consistent desktop layout and color-code folders.
Day 11 – Manage Downloads (Computer & Phone)
How many files do you download every week?
You’d be surprised how much, and they will keep piling up in your downloads folder taking up much-needed storage.
- Choose a specific download folder to save all your downloads, so they are easier to find and manage.
- Organize your downloads into subfolders based on file type or category.
- Use a download manager tool to track and manage your downloads, allowing you to pause, resume, and prioritize downloads.
- Regularly clear out old or unnecessary downloads to free up space on your computer.
- Enable automatic downloads for software updates to keep your system up to date.
- Set up alerts for when downloads are complete, so you can quickly access your new files.
Make organizing your digital world easier, get my free checklist!
Day 12 – Bookmarks, Browser Extensions & Tabs
Just like your desktop, your browser bookmarks can become cluttered with sites that you no longer visit. Delete bookmarks that you no longer need and organize the remaining ones into folders.
Maintain your bookmarks regularly so they don’t get out of control.
Browser extensions are useful and easy to download and use. For that reason, it’s always a good idea to check which browser extensions you have and delete the ones you do not use.
For Chrome:
- Click on the Ellipsis (three dots top right of window)
- Go to More Tools
- Scroll to Extensions
- Remove or deactivate using the slider.
For Edge:
- Click on the Ellipsis (three dots top right of window)
- Go to Extensions
- Then Manage Extensions
- Remove or deactivate using the slider.
For Firefox:
- Click on the menu icon (three horizontal lines in the top right corner of the window).
- Select “Add-ons” from the drop-down menu.
- In the “Add-ons Manager” tab, you will see a list of all your extensions.
- To disable an extension, click on the toggle switch next to it.
- To remove an extension, click on the three dots icon next to it and select “Remove”.
- To search for new extensions, click on “Find more add-ons” at the bottom of the page.
- You can also access your Firefox extensions by typing “about addons” into the URL bar.
Browser tabs: Too many at once. If the issue is that you don’t want to bookmark them, you might still need to go back to the website, grab the info you need and save it to a notes app like Google Keep or Evernote.
Day 13 – Unsubscribe from Emails
Unsubscribe from any emails that don’t hold any value or interest to you.
Promotional emails can really overwhelm your inbox at a fast speed. The best way to handle this is to unsubscribe instead of just deleting the emails.
What if you like getting promotions, updates, etc.?
It can be hard to unsubscribe if you’re a deal hunter, but it could also just be a case of FOMO (fear of missing out). A 10% discount on something you probably don’t need is not something that holds that much value.
Subscribe only for things that are valuable to you.
Take 30 minutes today to filter through your promotional emails and subscribe to low-value newsletters and subscriptions.
How to maintain your email on a regular basis:
- Unsubscribe from emails you don’t need or want anymore. This will help you get fewer new emails.
- Create folders to organize your emails. You can have folders for different kinds of emails, like work, personal, or promotional emails. This will help you find the emails you need and keep important emails safe.
- Check your emails at specific times of the day instead of all the time. This will help you stay on top of your emails and not get overwhelmed.
- Delete or put away emails when you’re done with them. This will help keep your inbox clean and make sure important emails don’t get lost.
- Use filters to sort your emails automatically. You can have filters that put emails from certain people in certain folders or mark certain emails as important. This will save you time and keep your inbox organized.
Day 14 – Create folders & Labels for Important emails. Empty Spam.
You likely receive many different types of emails like work, personal, newsletters, and promotions. Folders and labels will make organizing types of emails easier.
- Open your email account and create a new folder or label.
- Name the folder or label and select an email you want to organize.
- Click on the “Labels” or “Move to” option and select the new folder or label.
Empty the Spam folder and check it regularly. Sometimes, important emails get lost in the spam folder so it’s a good habit to check daily if you can and whitelist any emails you want to keep receiving.
Day 15 – Declutter the Rest
It’s the last day of the challenge and you’ve accomplished a lot over these past few days.
Going forward, regular maintenance will reduce clutter, relieve stress, and reduce the time it takes to tackle clutter when it appears.
There are still other forms of digital clutter to consider as part of your maintenance.
Here are a few:
Online accounts: Online accounts that you no longer use, or need can clutter up your email inbox and expose your personal information. Close accounts that you no longer use or need and delete any associated emails.
Old contacts: Over time, your contacts list can become cluttered with old or outdated information. It’s important to regularly review and delete contacts you no longer need.
Social media: social media can quickly become cluttered with posts, notifications, and messages. Consider unfollowing or muting accounts that no longer interest you and turn off notifications for apps that aren’t important.
You did it! 15 days of getting your digital life in order. How does it feel?
Digital clutter can be just as overwhelming and stressful as physical clutter.
If you want to perform your daily mom routine with ease, make sure your digital life is decluttered and organized along with the physical stuff.
With the 15-Day Digital Declutter Challenge, you can take small, doable steps toward getting organized and reducing digital clutter.
In a few minutes each day, you can make significant progress in keeping your digital life stress-free.
Don’t wait until it’s an emergency – if you haven’t started the 15-Day Digital Declutter Challenge, start today!
Make organizing your digital world easier, get my free checklist!